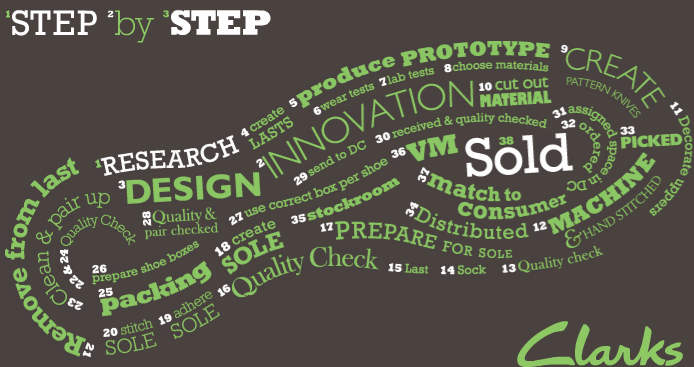
The life of a shoe
-
Step 1 – Research
Everything starts with consumer research. We measure feet of all shapes and sizes to make sure we're offering the right range of sizes and styles for consumers. But we don't just measure feet. We talk to consumers too, to find out what they want and need from Clarks. We also have an eye on the fashion shows, making sure we know all about the trends for the coming season.
-
Step 2 – Innovation
Innovation's a big, big thing for Clarks. During the design and innovation stages, our teams of product designers are looking for new inspiration for colours, materials, constructions and technologies.
-
Step 3 – Design
With a finger on the fashion pulse, and with up-and-coming trends uppermost in their thoughts, our shoe designers create beautiful, comfortable, desirable styles.
-
Step 4 – Create Lasts
Lasts are foot shapes initially carved from wood, and then manufactured in bulk using other materials. They're shaped to mimic the foot as it would sit in the shoe, so they'll differ depending on, for example, the heel height. The last forms the basis for the shoe to be built on.
-
Step 5 – Produce prototype
Before we make anything in quantity, we first create prototypes. Initially, we'll make them in cotton. This way we'll know that the pattern pieces work together. Then we'll make them from the suggested material, usually leather. Prototypes are crafted by hand in our factories overseas and then sent to our global head office in Street.
-
Step 6 – Wear tests
When we get the prototypes, we fit test them to make sure they meet our high standards. Then we ask people to wear test them, to try them for comfort, to make sure they're fit for purpose and of good quality. So don't be surprised if we ask you to wear a pair when you work with us! We'll also you to fill out a short report card and we use these to make any recommended changes or improvements. Local schoolchildren often road-test our kids shoes.
-
Step 7 – Laboratory tests
Before we mass produce shoes, we test and test and test them, and that's the job of our laboratory team. They'll look at the adhesives, the grip of the sole, the water resistance and the fastenings.
-
Step 8 – Choose materials
Once we've done all our rigorous testing, we'll choose the materials and we'll get the leather sent to our factories. Then the factory team will grade the leather by marking it out in chalk. This makes sure that were only using the finest pieces.
-
Step 9 – Create pattern knives
Our footwear patterns can contain up to 60 different components to make up the whole shoe. Each pattern piece needs a 'knife' or cutter. These are made in the factory by hand by bending the metal into the shape of the pattern piece and then giving them a sharp edge. The pattern knives are marked to indicate the many different sizes and for one style in each size. This can mean making up more than 300 'knives'.
-
Step 10 – Cut the patterns from materials
The knives are then used to cut the pattern pieces from the large skins of leather. We make sure that we're getting the maximum number of pieces from each piece of leather, avoiding unnecessary wastage.
-
Step 11 – Decorate the uppers
Whether it's a funky screen print or a clever 3D feature, here's where we decorate the shoes and complete the next stage of their development. Lots of children's shoes have brilliant features, making them entirely unique and unmistakably Clarks.
-
Step 12 – Machine or hand stitch the uppers
Our factory teams will trim or "skive" the pattern pieces to make sure the finished upper is comfortable. They'll stitch the many pattern pieces together to form the upper of the shoe. And while some of this is done by large industrial strength sewing machines, the process isn't automated. Perhaps even more surprisingly, many of our shoes and boots also have features which are hand stitched in the same way that Clarks has been making shoes for 185 years.
-
Step 13 – Quality check
Once the uppers have been stitched, everything's quality checked. Any shoes with poor stitching or flaws are discarded.
-
Step 14 – Create the 'sock', making the shoe
The 'sock' or lining of the footwear is stitched together and then stitched into the upper. We use a variety of different materials and methods to make the sock, depending on the style of the shoe. This can include stitching in a sock or the sole directly to the upper before shaping the shoes.
-
Step 15 – Form the shoe on the last
It's at this stage that the uppers are matched to their corresponding last and insole. These are then pulled onto the last by hand or by machine, forming the shoe's shape and making the shoe ready for its sole.
-
Step 16 – Quality check
More checks. More quality control. If they pass, the shoes go on to the next stage.
-
Step 17 – Prepare the shoe for the sole
The shoe's ready for its sole. Here we need to roughen the edges of the leather where the sole will be attached. This gives the adhesive more purchase. We then add the 'cement' to the upper and sole in readiness.
-
Step 18 – Create the sole
We create the soles in the factory too, and from all sorts of materials. They're then batched in size order ready to be matched to the shoe.
-
Step 19 – Adhere the sole
We stick the sole to the bottom of the shoe using the 'cement', an incredibly sticky adhesive. The upper and sole are heated to reactivate the adhesive, the sole is carefully positioned on the upper and then put in a press up to three times to make sure everything sticks together.
-
Step 20 – Stitch the sole
Once the cement's dried, the sole is stitched. If you look at a selection of Clarks shoe, you'll notice that we stitch the soles to the uppers in lots of different ways. Sometimes invisibly and sometimes as a feature, as seen in our iconic Desert Boot.
-
Step 21 – Remove from the last
The finished shoe can now come off the last! Lasts are designed to 'snap' in the middle to make it easier to take the shoe off.
-
Step 22 – Quality check
Step 22 – Another quality check to make sure the shoe�s perfect.
-
Step 23 – Clean and pair check
We clean off any bits of 'cement', odd bits of stitching and any other dust or dirt. We then pair shoes up and double check that we've got a matching pair.
-
Step 24 – Quality check
Step 24 – The final, final check before they leave the factory. We check the upper, the stitching, the inner, the sole and the fastenings. Again, if we find any flaws, we discard the shoes.
-
Step 25 – Packing
The pairs of shoes head off to the packing area ready to be boxed.
-
Step 26 – Prepare boxes for shoes, construct and label
The shoe boxes are put together and labelled for each style and size.
-
Step 27 – Match boxes to pairs
Each pair of shoes is assigned to its box.
-
Step 28 – Quality and pair check
Another final, final check. We make sure that the box matches the shoes and that the shoes match each other. We'll also give the shoes a final once-over for quality. If all's well then it's off to dispatch.
-
Step 29 – Dispatch to the distribution centre
We pack the shoes into cartons and they're loaded into containers then onto ships which carry them to the country from which they'll be distributed. This can take up to 28 days! From the port, they're assigned to the lorries which take them to the distribution centre.
-
Step 30 – Received and quality checked at the distribution centre
Once they've arrived at the distribution centre, the containers are unloaded and the products go through another rigorous quality check.
-
Step 31 – Assigned space in the distribution centre
The shoes are assigned space in the distribution centre. It's like an enormous stock room with each size and style organised onto shelves ready for the next step.
-
Step 32 – Ordered by customers, consumers and for stores
The shoes in our UK distribution centre can be ordered online for dispatch straight to our consumers' homes or to a store of their choice. We also send the shoes to customers in our franchise and independent stores, as well as our joint venture stores.
-
Step 33 – Picked and packed in the distribution centre
Our distribution centre teams receive orders through some clever handheld technology. This tells them what they need to pick for each customer, consumer or store. We then treble check the orders before wrapping them for dispatch.
-
Step 34 – Distributed
The products are loaded into containers, hooked up to our lorries and head off to their destinations!
-
Step 35 – Unpacked and stored in the stock room
When they get to a store, the boxes are unpacked and put into the stock room. Like the distribution centre, they're organised into styles and sizes to make them easy to find.
-
Step 36 – Merchandised in store
We want customers to see all of our products in all their glory, so one of each style is showcased in the store. This way, customers can see exactly what's available. We work hard to make sure that we have beautifully designed shoes in beautifully designed stores, and the way we present our products and stores is incredibly important to us.
-
Step 37 – Matched to the consumer
Now it's over to our fantastic sales teams. They talk to customers and get to know what they want and need. They'll show them the products that are right for them, and help them to try on shoes and feel for themselves how comfortable they are and see how fabulous they look! It's matchmaking really, helping every customer to find a pair of shoes or boots they'll love.
-
Step 38 – SOLD!
Once we've advised the customer, helped them find the perfect pair of shoes, and given them a few hints and tips on looking after them, it's time to say goodbye. The shoes leave the store with their new owner and begin the next chapter in their life. Off to pastures new and who knows what adventures!